Uncategorized

Learning How to Lead Climb – Part 2: Conquering the Test and Celebrating Success

It’s been a little while since I finished the second part of my lead climbing class and passed the lead test after a second try. Let’s dive into my journey and recent climbing adventures.

An Exciting Day at Brooklyn Boulders:

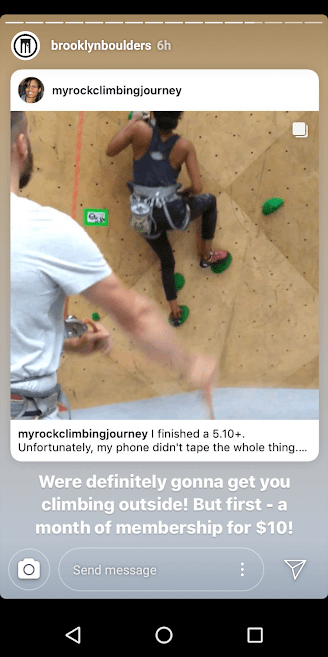
Yesterday, I had the pleasure of climbing with my regular Meetup group at Brooklyn Boulders. I squeezed in some lead climbing after helping a fellow climbing partner with his lead test, which he aced. He was one of the lucky climbers who didn’t need to take a class to get lead certified at BKB. His seasoned climbing experience, both indoors and outdoors, made it a breeze for him. The highlight of my day, however, was when I and nine other climbers were featured on Brooklyn Boulders’ Instagram. We submitted our climbing photos and videos for a chance to win a one-month membership for just $10 in honor of BKB’s 10th birthday. I was thrilled when I was one of the winners. It came just in time as I had only two passes left in my 10-pack. Happy Birthday Brooklyn Boulders!

First Class Recap:

In my previous blog post, I detailed the first part of my lead climbing class, which included learning about quickdraws, how to use them while climbing, and the three key mistakes to avoid while lead climbing: Z-clipping, back clipping, and back stepping. If you missed it, you can read more in my previous post.

Second Lead Class Recap:

Upon our return to the second part of the class, it was time to delve into practice falls and lead climbing. We couldn’t literally take falls, but we could do demo lead climbing and falls under the guidance of our instructor. We honed our command drills for taking rope, feeding rope, and hand positioning for a fall. The focus of this class was learning how to lead belay.
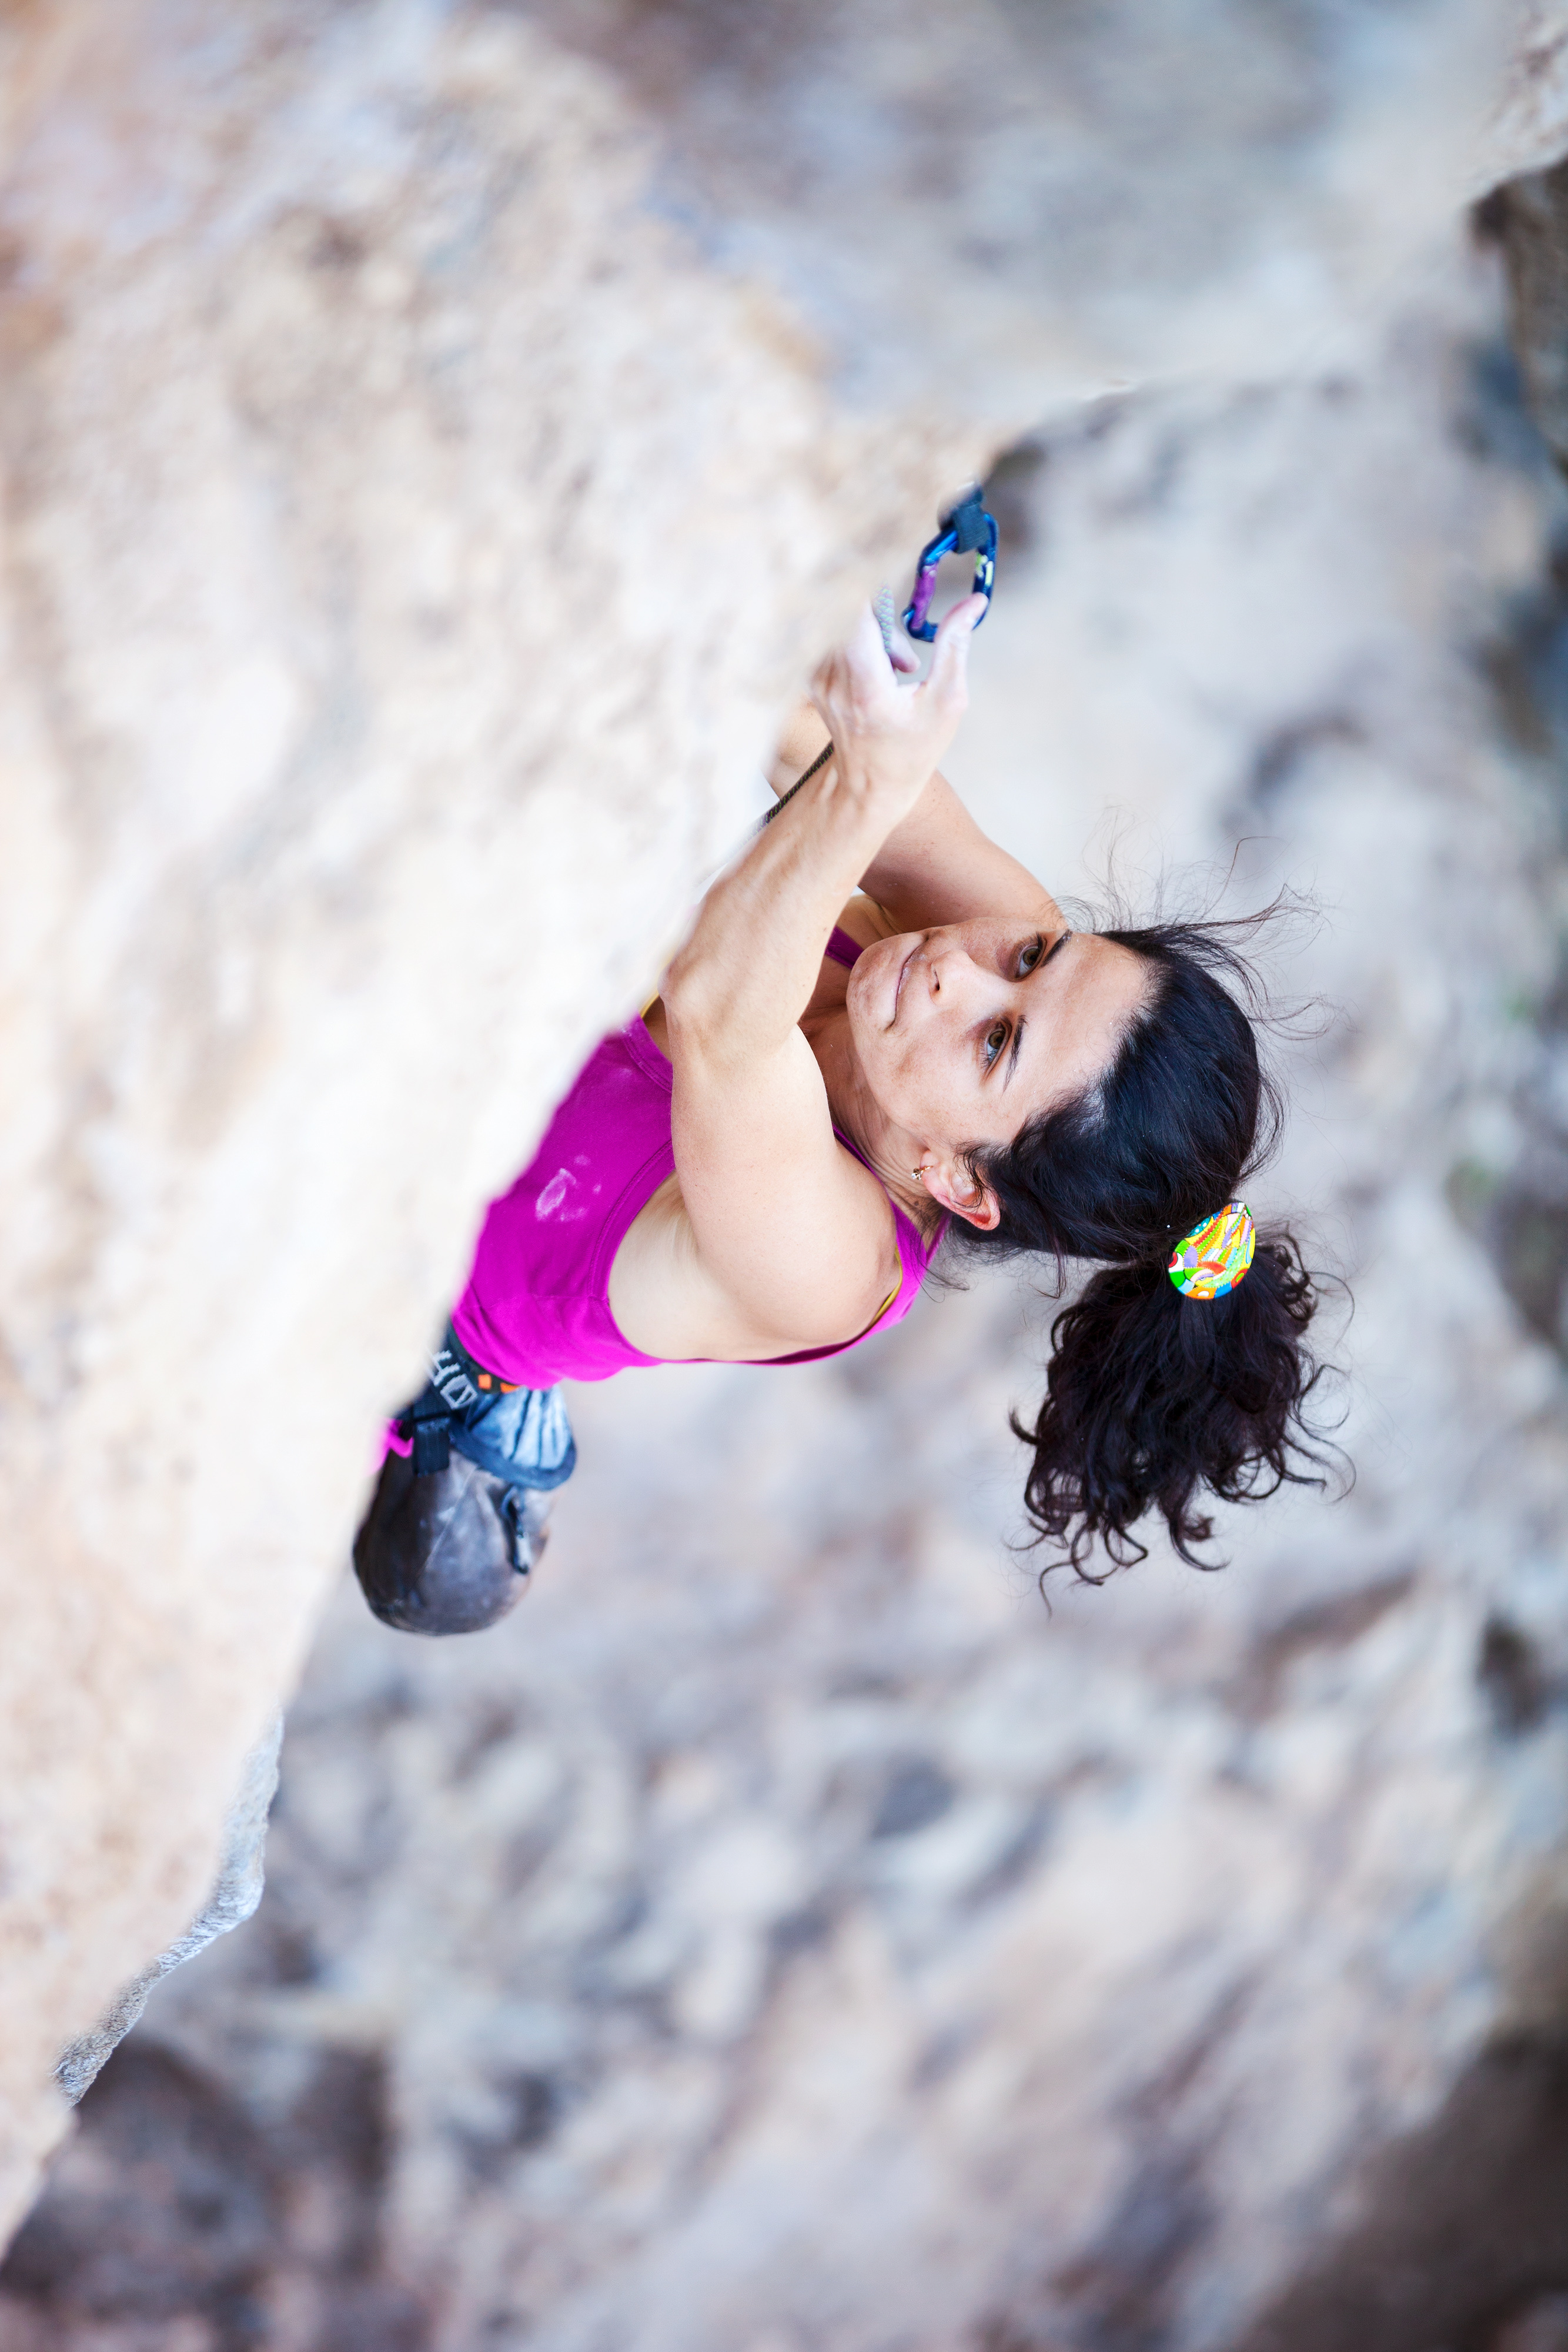
Mastering the ATC:

We learned the importance of feeding the rope quickly while observing the leader’s clip and then taking out the slack once the leader secured a clip. The first three clips should keep the rope “tight” to prevent the climber from hitting the ground in case of a fall. When feeding rope with an ATC, the belayer pulls the rope with their left hand, automatically pulling up the break hand (right hand). The break hand then slides down the rope to feed it into the ATC, never letting go of the rope. Maintaining close proximity to the wall while belaying is crucial to avoid being smashed into it if a fall occurs. The belayer should steer clear of the climber during the first three clips, known as the “red zone.” Being on the climber’s side is a safer position. As the climber ascends higher, it becomes acceptable to be “under” the climber while belaying.

Stance plays a pivotal role in belaying. Keeping one foot forward helps maintain balance and steadiness, ensuring the right position to respond to a fall. Unfortunately, we didn’t get to practice belaying on a grigri during the class, but I found that belaying with an ATC worked well for me.

Catching a Fall with Grace:

For both short and long falls, a lead belayer should “embrace” the impact by moving “up” with the fall. If the belayer is lifted off their feet, they need to face the wall or rock, with their feet ready to land on the wall or rock for stability. Being close to the wall or rock is essential to avoid being thrown into it during a fall.

The Lead Test:

I completed my lead class on the 11th of this month and took the lead test the following week. My partner at that time also needed to pass the test for lead certification. The test has three components: naming the three common lead climbing mistakes, demonstrating a lead climb, and showcasing belaying skills. We were asked to identify the three common mistakes and explain why they should be avoided. Following that, we each had to lead a climbing route, fall twice, and then finish the route. This part proved physically challenging as falling takes a toll. But I persevered.

Once the climbing portion was completed, we moved on to the lead belaying test, which involved showing how to position the rope on the ground, secure a knot at the end of the rope, ensure that the rope and the belay device were properly inserted into the carabiner, and more. We had to demonstrate how to feed the rope, take the rope, and catch a fall, including knowing when to execute these actions.

My first attempt at the lead test ended in failure, and I was disappointed. However, the tester’s strict approach helped me understand my mistakes. He pointed out that my technique was fine but I needed to climb quicker while clipping and avoid being under the climber during the first three clips.

After more studying and practice, I decided to retake the lead test with a different tester. During the test, I initially thought I might fail again as I struggled with a challenging route that had tricky finger holds (incidentally, I conquered that route yesterday). The tester gave me another chance by allowing me to choose a less challenging route. She commended my belaying skills, as well as my ability to fall and clip. When she told me I’d passed, I was ecstatic. Though I didn’t need to complete the route after falling, I was willing to do so if she had asked.

Final Thoughts on the Lead Climbing Journey:

My journey into lead climbing was everything I expected it to be. Challenging, yes, but also incredibly fun. I found myself enjoying falling, of all things! I still need to work on my clipping skills. Perhaps I’ll explore other techniques demonstrated by fellow climbers. My next step is to take the BKB Climbing Workshops: “Stop Saying Take: Mental Training for Sport Climbing” and “Sport Anchor + Rappel.”

Question of the Day:

What was your experience like when you took your lead climbing test? Do you have any advice for those interested in lead climbing? Share your insights with us!

Uncategorized

Learning How to Lead Climb – Part 1: My Climbing Journey So Far

Young female rock climber clipping rope while lead climbing

My rock climbing journey began in April last year when I decided to celebrate my birthday with an adventure – indoor rock climbing. Since then, it has been a journey filled with determination, challenges, and exhilarating experiences.

Starting Steps:

I started by taking the Intro to Climbing and Learn the Ropes courses at Brooklyn Boulders. Overcoming a slight fear of heights, I pushed myself to climb efficiently. Last year, my climbing buddy, June, and I were conquering 5.10+ routes, and we felt like superheroes. It’s not the highest level, but it’s certainly not the lowest either.

Winter Break Setback:

After a winter break of almost five months, I returned to climbing in mid-April. It didn’t take long to notice some setbacks, but I knew they were fixable. I needed to regain my climbing touch and implement what I’d learned the previous year. Straight-arm climbing remained a challenge for me, but I was determined to improve. Lesson learned: no more winter breaks.

What’s Happening Now:

One of the highlights of this year’s climbing journey was joining a rock climbing community through Meetup in May. It opened doors to meet climbers like myself, from beginners to advanced. During a Meetup event, I met a fellow climber who loved bouldering, a facet of climbing I hadn’t explored much last year. This experience helped me regain finger and arm strength and focus on footwork. With renewed confidence, I decided to face my fear and start learning lead climbing.

The Lead Climbing Class:

Taking my first lead climbing class was a mix of excitement and nervousness, given my lingering fear of heights. The class spanned two three-hour sessions, and I joined five others, along with a friendly instructor. We started by getting to know each other, sharing the strangest things we’ve ever eaten (bull balls and lamb brain were some of the unique answers).

Our instructor took a discussion-based teaching approach, keeping the class interactive. We delved into the world of quickdraws, discussing their design and proper handling. Then came the practical part: learning to clip our ropes from various positions using both hands. It seemed more challenging than the YouTube tutorials and videos of professional climbers made it appear.

We also learned about the common mistakes of lead climbing: Z-clipping, back climbing, and the danger of having the rope behind the leg. I experienced some of these mistakes during the demo clipping sessions. It was one thing to understand the concept, but demonstrating it was a whole new challenge.

Demo Fall:

The class concluded with a demo fall. Surprisingly, it wasn’t as daunting as I expected, possibly because I’d had my fair share of falls during bouldering. One crucial lesson: don’t grab the rope when falling; keep those hands free to focus on using your feet.

Looking Ahead:

Lead climbing is both adventurous and complex, demanding constant alertness. I’ve decided to practice more at the gym before taking the second part of my lead class. We’ll be covering belaying for lead climbing and reviewing what we learned in the first session.

Question for You:

Are you a rock climber? If so, what type of climbing do you enjoy the most? Share your climbing journey with us!

Uncategorized

Rock Climbing Essentials: What’s in My Gym Bag for a Successful Indoor Climb

Adventure Awaits: Geared Up and Ready to Conquer New Heights

If you’re stepping into the thrilling world of indoor rock climbing, being well-prepared is key to a safe and enjoyable experience. When I first started climbing, I opted to rent gear at the gym. However, as my passion grew, I realized it was more cost-effective to invest in my own climbing equipment. After some trial and error, I’ve found the perfect gear for my climbing level, and I’m here to share my recommendations with you.

The Right Bag:

Before diving into climbing gear, you’ll need a reliable bag to carry it all. I opted for the Lululemon City Adventurer Backpack 17L, which has dedicated compartments for shoes and workout clothes, an outer pocket for a smartphone, an inside pocket for a water bottle, and even a laptop compartment. Plus, it’s water-resistant for those unexpected drizzles.

Climbing Shoes:

The foundation of your gear collection should be climbing shoes. Brands like La Sportiva and Butora offer excellent options. I personally love the Butora Endeavor Wide Fit Climbing Shoe. It’s eco-friendly, featuring 100% organic hemp lining for stretch control and odor management. Just remember to buy them 1.5 sizes larger than your regular shoe size for a comfortable fit.

Climbing Socks:

While most climbers don’t wear socks with their climbing shoes, I invested in Butora climbing socks to prevent smelly shoes after extended use. Made from 100% organic hemp, these socks provide a snug fit and extra comfort.

Harness:

Comfort is vital when it comes to harnesses. Rental harnesses at the gym may lack the padding needed for a pleasant climbing experience. I recommend the Black Diamond Women’s XS Smoke Primrose Harness, known for its adjustability and quality.

Chalk:

For a firm grip, chalk is a must. Opt for loose chalk or a chalk ball, as they tend to be more versatile than the liquid version. Your choice of chalk bag depends on your climbing style, with small chalk bags being suitable for most indoor climbers.

Belay Devices and Carabiners:

Most gyms provide rental belay devices, but if you plan to bring your own, consider the Petzl Grigri 2 Belay Device for its automatic lock feature. Pair it with carabiners like the Black Diamond Gridlock Screwgate Locking Carabiner and Black Diamond RockLock Screwgate Carabiner for added safety.

Get Expert Advice:

If you’re still unsure about the right gear or have questions about your climbing adventure, you can turn to online resources like Backcountry. Their Gearheads experts can guide you in choosing the right equipment and answer any questions you might have about various adventure sports.

With the right gear in your gym bag, you’ll be well-prepared for your indoor climbing sessions. This list of essentials has been curated from my own experiences, ensuring that your climbing journey is not only thrilling but also safe and comfortable. Happy climbing!